First you will need to make sure you have your base products added and also a gateway account. Once you have products and gateway accounts added you can follow the instructions below.
Go to CRM → Campaigns and click the Blue Edit Button:
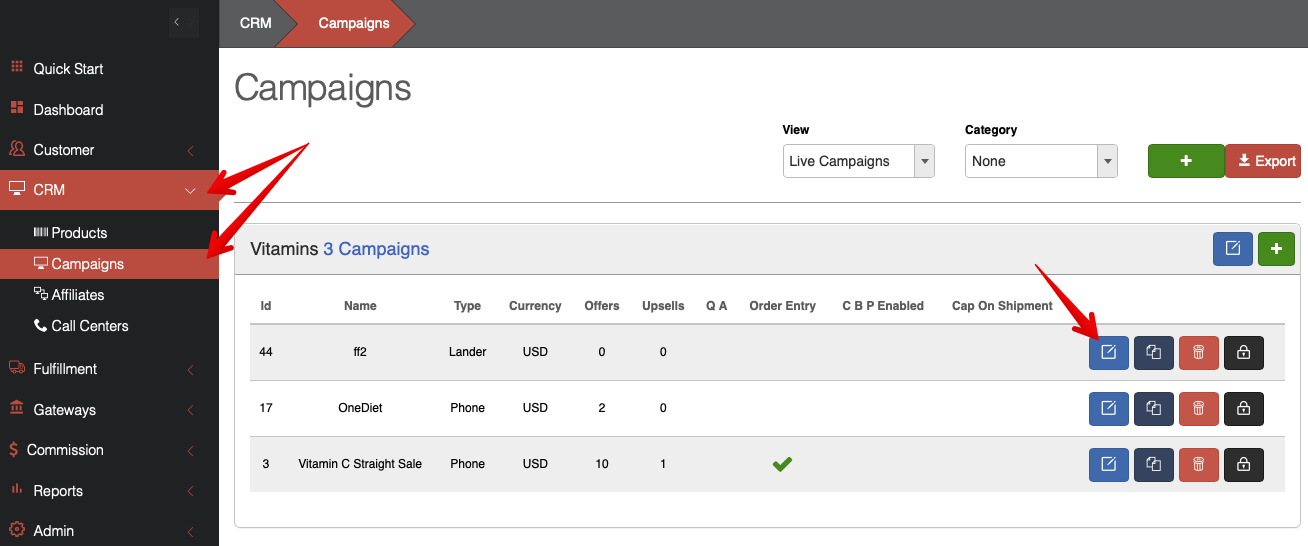
This will open the Campaign Editor. Under Campaign Products select Options to Add Offer or Add Upsell.

This will open the Offer Editor. It contains sections for the General Details, Billing Schedule, Trial Options, and Order Limits of the Campaign.
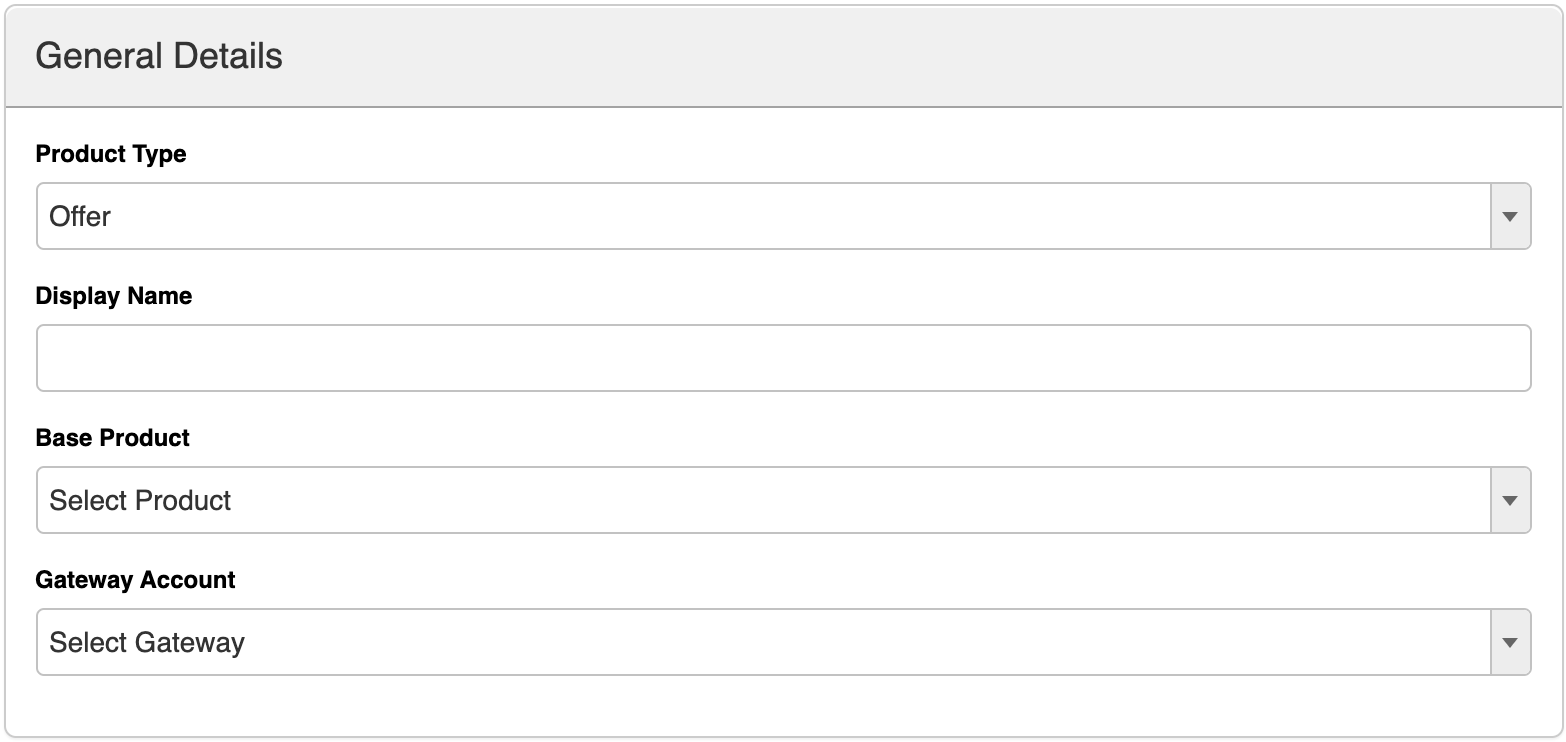
Product Type: Offer or Upsale
Display Name: The name for the product in the CRM
Base Product: The product you created under the Products Editor
Gateway Account: The gateway you want to process the sales against
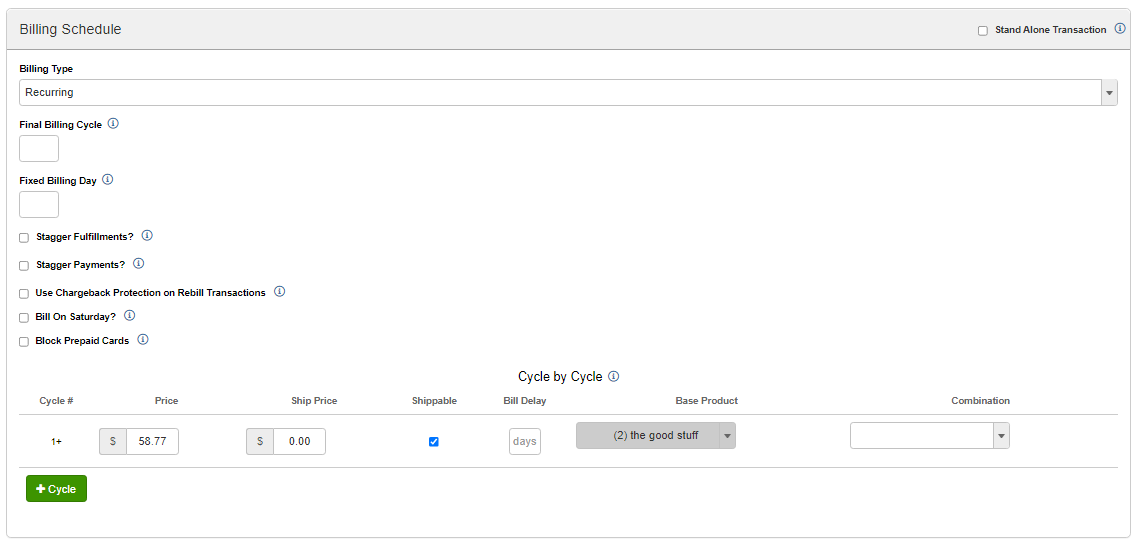
Billing Type: One Time, Recurring, or Multi Pay
One Time – Straight Sale products with no rebill
Recurring – Customer on a subscription who pay monthly/yearly
Multi-Pay – Customer pays for a product with multiple payments
Final Billing Cycle: The Cycle where you want to end Recurring Billing
Fixed Billing Day): The day of the month you want to bill purchases under the campaign
Stagger Fulfillments: Check this option if you want bill more frequently than you send Fulfillment. For example if you send 3-month supplies but still bill monthly.
Stagger Payments: Check this option if you want send Fulfillments more frequently than you bill. For example if you send monthly supplies but bill yearly.
Use Chargeback Protection: This setting will preauthroize the full billing amount on the day of billing and hold the transaction in a pending state. After the number of days specified (maximum of 10), the transaction will be captured/settled. There is also an option to delay fulfillment until successful capture.
Note: This can be used in conjunction with Capture on Shipment (configured on the campaign). In the case both are enabled Capture on Shipment will only affect the initial order.
Note: Enabling this option will delay shipping integration.
Bill on Saturday - Enabling this setting will move the next bill date to the first Saturday after the cycle bill delay. This was implemented to support the concept that many people are paid on Fridays.
Block Prepaid Cards - Enabling this setting will prevent prepaid cards from being used to purchase this item. This will allow for a more customized approach for blocking prepaid cards. Rather than blocking all prepaid cards from a campaign you can now specify which products can/cannot accept them. This option will not be displayed if the Block Prepaid Cards campaign level option is checked.
Stand Alone Transactions- Enabling this option will force this item to always be billed as a stand alone transaction. It will never be combined with another item into a combined transaction.
Cycle By Cycle: Define the Price, Ship Price, Shippable Status, Bill Delay, Product Rotations and Product Combinations (if applicable) per cycle.
In the example above, this Recurring purchase will bill $39.99 at the time of purchase and will ship the product. This will repeat every 30 days until the customer cancels or declines out.
See Common Offer Setups for more examples
In the example above, this Recurring purchase will bill $39.99 at the time of purchase and will ship the product. This will repeat every 30 days until the customer cancels or declines out.
See Common Offer Setups for more examples
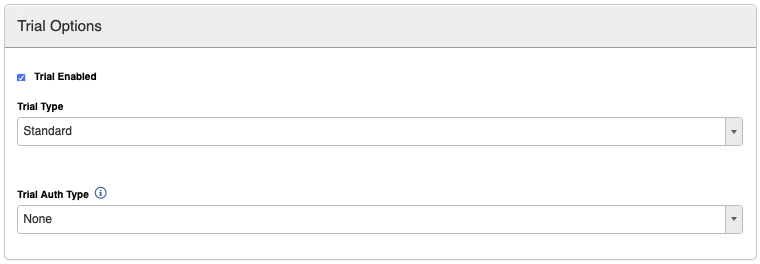
Standard: Trial period is determined by amount of days
Accelerated: Accelerated trials bill cycle 2 within a specified number of minutes of a sale. This cannot be greater than 24 hours. Enter the duration in minutes of the free trial under Trial Length.
Authorize and Void: This strategy only allows an order to process if an authorization against the full cycle 2 trial amount is approved. On approval, the shipping is billed, the initial authorization is voided, and the order is completed.
Hold Trial Charge: Like Authorize & Void, this option authorizes the full cycle 2 trial amount. The difference is that the Authorization is not voided, but instead is left in place. On the day of the cycle 2 billing, the authorization is settled. This option has excellent approval percentages (100% often), but is disadvantaged because the charge is visible on the customers card as a pending transaction for the duration of the trial.
PreAuthorize: This option is only used for free trials. It will preauthorize a card for $1.00 and immediately void it.
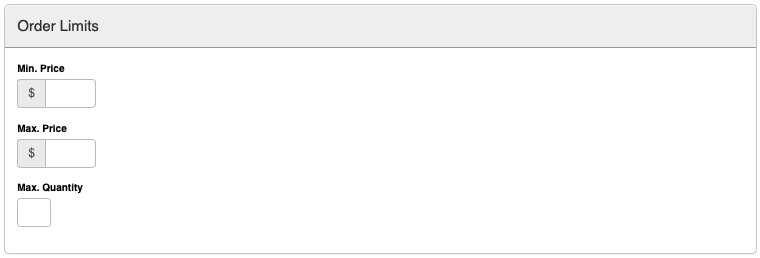
Min. Price: The lowest price a Campaign Product can be sold for.
Max. Price: The highest price a Campaign Product can be sold for.
Max. Quantity: The maximum quantity of products a single order can contain.
Press the Create Product button when you are done.
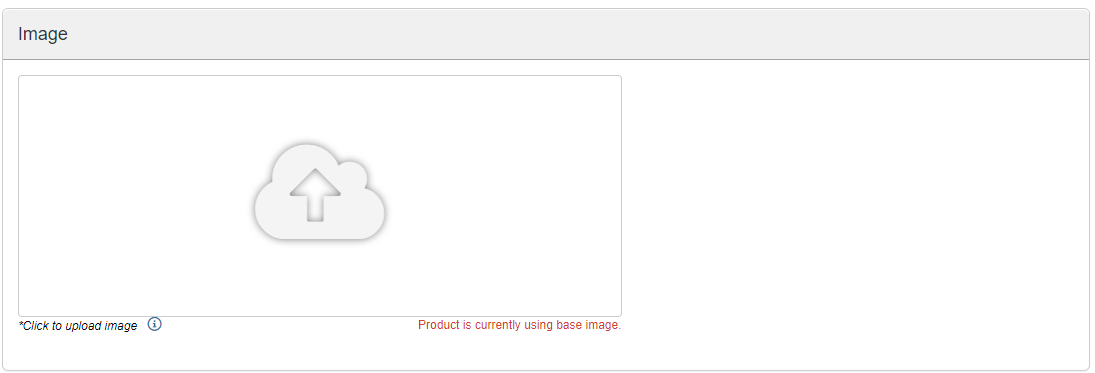
After creating the product, you will see an option to upload an image. If you have uploaded an image to the base product, you will see that image instead of the default upload image.
Click on the image window to choose an image to upload. The campaign product image will overwrite the base product image where applicable. Uploading an image to a campaign product will not change the base product image itself.